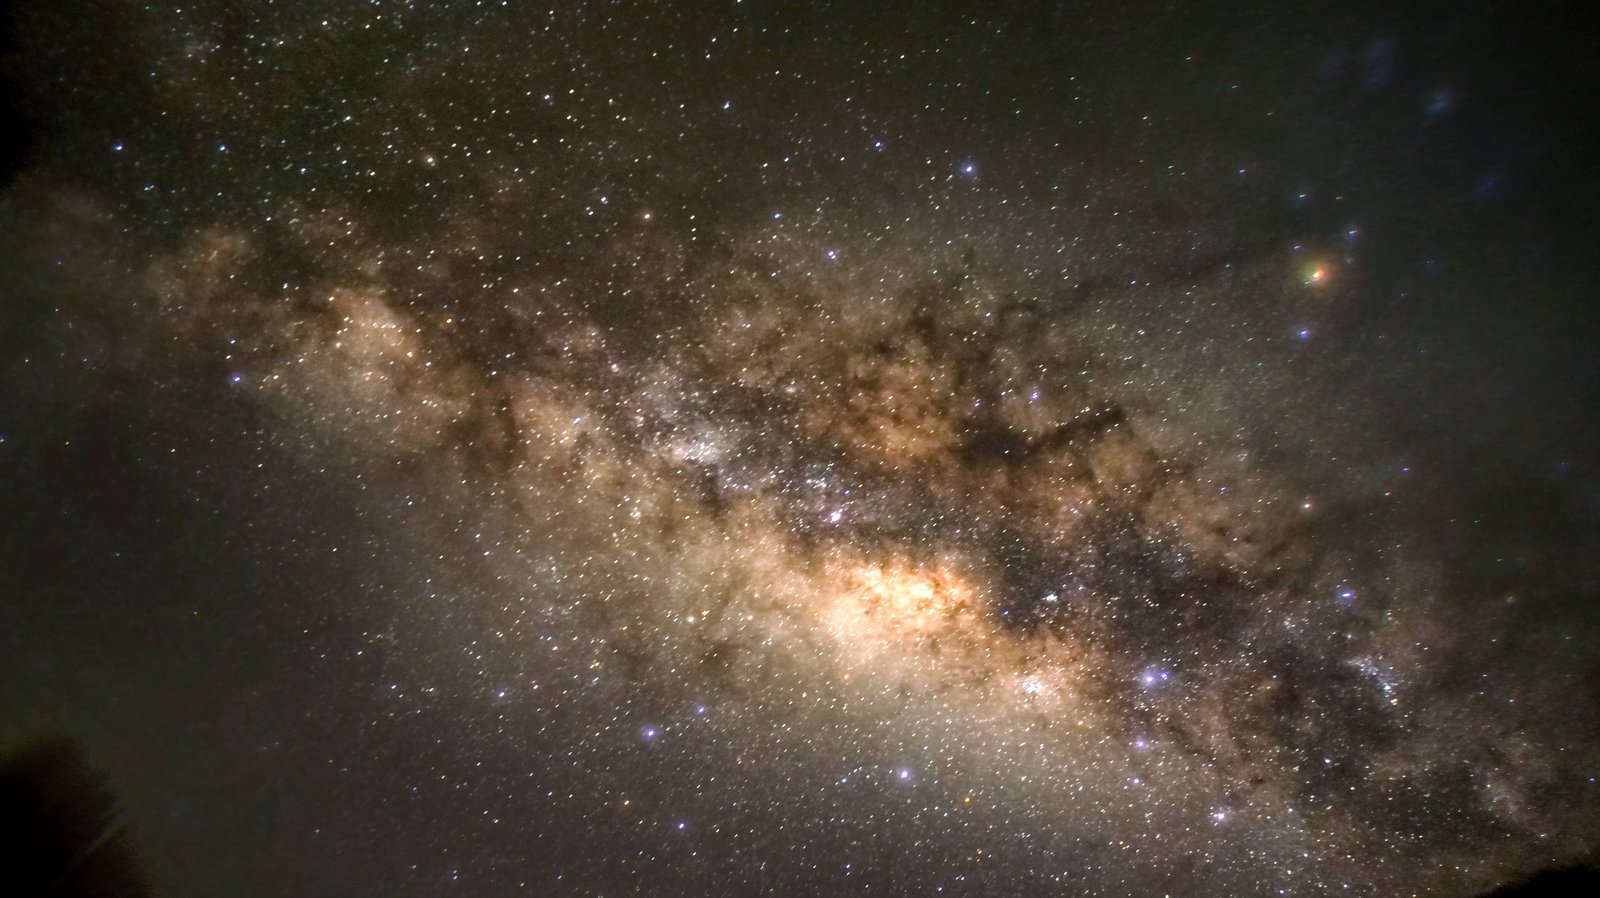
Astrophotography is an art that depends mostly on things the artist does not control: weather, light pollution, air pollution. As for gear, any entry-level professional camera is enough to start shooting the Milky Way core. What matters far more is a dark sky — a rural place, away from city lights. You also cannot shoot when the moon is up; moonlight alone will wash the sky out.
What you are actually photographing
The Milky Way contains billions of stars, including our own Sun. It is shaped like a spiral with arms stretching out from the core, but from Earth it appears only as a band of cloudy light to the naked eye. The galaxy is 100 light-years thick, and photographing all of it would mean putting the camera further away than any current technology can reach.
What you see in the image above is the core, along with the interstellar gas and dust blocking the light. At its heart, and the dominant force in that region, is a one-million-solar-mass black hole named Sagittarius A — responsible for the emitted light, since it accelerates the matter around it. We do not know the current state of the Milky Way, because of how long light takes to travel. We would have to wait 27,000 years. So when you look at this image, you are looking 27,000 years into the past.
With your own eyes the Milky Way looks nowhere near this detailed or colourful. Our eyes resolve colour poorly in the dark, so it shows up as pale, milky patches. A camera, set correctly, sees far more under dark conditions than the naked eye does — and that same principle, configuring the camera to capture more information than you can perceive, is the whole basis of deep-sky astrophotography.
Shooting basics
There are three parameters on an entry-level professional camera: shutter speed, aperture, and ISO (sensor light sensitivity). Every photograph is a combination of the three. Manual mode hands you all three, so the first step is to shoot manual. Shoot RAW rather than JPEG, which compresses the image and throws away data you will want later.
Shutter speed
This is how long the shutter stays open. A fast shutter speed means a shorter exposure — less light — and a slow one means a longer exposure. For the Milky Way you need more light, so you want a slower shutter speed.
Longer exposures bring two problems. The first is shake: any hand movement while the shutter is open produces ghosting, so a tripod or other stable surface is mandatory. The second is star trails — the Earth's rotation registers the movement of the stars across your frame. The expensive fix is a star tracker. The easy fix is choosing your shutter speed from the focal length using the 500 rule: at 50mm, the slowest you can go is 500/50 = 10 seconds. The wider the lens, the slower you can shoot, and the longer you can expose.
But a single frame may not give you a good result — you need more data, and that means stacking. Stacking combines multiple exposures to improve the signal-to-noise ratio. A tracked 5-minute exposure is roughly equivalent to ten stacked 30-second untracked exposures. The stacked version will not quite match the tracked one, since some additive noise survives stacking. But stacking is a much better place to start than buying a tracker, and the skill keeps paying off: if you do get a tracker later, you can stack tracked frames too, which gives the best result of all.
Aperture
Aperture is how far the lens diaphragm opens, denoted in f-stops. It affects depth of field: the lower the f-stop, the larger the opening, the shallower the depth of field, the blurrier the background. The higher the f-stop, the smaller the opening, the deeper the field, the sharper the background.
You want a large opening for exposure, but you also need your subject properly focused — at infinity, in this case — and depth of field will blur everything else. To focus, set focus to manual, point at a bright star or planet, and rotate the focus ring until it resolves to a point source. Once it is set, changing the focal length shifts the focus, so do not touch the lens setup for the rest of the shoot.
ISO
ISO is the sensor's sensitivity to light. Higher ISO means a more sensitive sensor, and shooting in the dark demands a high value. But the camera's whole ISO range is not usable — electronic noise is why. Find the highest value your body can take without visibly degrading the image; the symptom of pushing too far is grain.
Prerequisites
- Dark sky. It is difficult or impossible to shoot the Milky Way from a city, or on a full moon night, because of light pollution.
- Milky Way season. Know when and where to look using any star-tracking mobile app. The season varies by location.
- An entry-level professional camera — one that can capture data over a long exposure.
- A tripod or stable platform, to avoid distortion from shake.
- A computer for post-processing. Technically optional, but you will want it for stacking and processing.
- A tracker. Optional and genuinely not necessary — an expensive tool that cancels the Earth's rotation and avoids star trails.
And finally, may the weather lords be with you.